Jumps explained
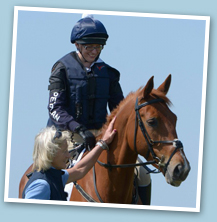
Here six times Badminton winner and eventing legend, Lucinda Green talks about the different cross country fences. Whether you're taking a horse for its first cross country schooling trip, or preparing for an advanced competition there are a few basic cross country principles to keep in mind. Watch these videos and take a look at Lucinda’s advice to help make your trip as rewarding as possible for you and your horse.
1: Training for Cross Country
Communication between horse and rider is the foundation of safe cross country riding. Use your 20 to 30 minute warm up to make sure your both listening to each other. Fundamentally ensure you have a stop button and a go button. Start with small jumps, built using poles and stands this way you are able to make things easier should there be a problem, thereby building yours and your horse’s confidence. Don’t let your horse learn there is an option to run out or stop. If your horse stops at least you have done half your job, in this situation rein back a few steps and then ask again, providing the fence is not too big. When your horse feels confident and is listening proceed to solid fences that you are comfortable with. Progress sensibly ensuring you horse enjoys it.
2: Skinnies
Skinnies are a fashion on cross-country. When they were first introduced we saw many run outs and refusals. Use them in your training they are really useful to develop the communication system between you and your horse. Keep your horse focused by “putting him in the tube” – having both your legs wrapped positively around him. With your hands slightly apart as you approach at a steady pace, stay sitting up even as he takes off, throwing your shoulders forward too early will throw your horse off balance. Make sure your horse can always see a way through the fence and out the other side.
3: Ditches
Famously a rider frightener - a ditch represents a crack in the ground of which horses are naturally wary. Start in walk with narrow ditches and slowly build up to bigger ones. Let your horse see the ditch by allowing him to stretch his neck, remember the top half of his eye is his close vision. Keep your fingers elastic on the reins – you may have to slip them to let him look, but be ready because he may then use that freedom to whip away.
It’s important he sees and understands what he is doing to build up trust.
Sit late when he says he is going to jump don’t believe him, be ready to kick. However, it’s important not to kick from 100 yards out; or he will speed up and won’t have time to look and think.
4: Drops & Steps
Horses should learn early in life to climb up and drop down banks use these in training as well as, riding over undulating ground to help them develop balance and confidence. When you first introduce a bank make sure it is small and walk up it a number of times before turning round and coming down in the same place. As a rider it’s important to maintain your balance so, be ready to lean back and open your fingers. Make sure you allow your horse to stretch his head and neck before during and on landing from the bank. Practice up and down banks in all 3 paces but never fast, most horses prefer to be in trot before they drop down banks.
5: Water
As with drops it’s natural for horses to be wary of water. It’s good to be in a group of more confident horses; walk in and out together until your horse trusts the water. Once he’s happily walking in and out, trot then canter through the same bit of water. It’s important to do these early stages so that your horse learns how it feels when water splashes up onto his legs tummy and eyes. . Some horses don’t like a wet tail hitting them - if this is the case it could be tied up. It’s great to let your horse enjoy splashing around in water so that he learns its fun. Beware some horses have a tendency to roll.
All the principles are the same as for riding drops so start in the same way (see above). Only start by jumping directly in to water when you know your horse has developed his confidence. Even the most advanced horses will benefit from playing in water, walking, trotting and cantering up and down banks.
6: Corners
The key to riding corners is not to let your horse run out otherwise they will quickly learn that a side door exists. Start with poles and upright stands, and then move on to small fixed fences. Imagine the corner is a skinny. Starting from the narrow end mentally measure four feet towards the inside, put an imaginary flag at this point and make sure you jump within this area. Provided your horse has seen the jump and you keep him straight, in front of your leg and balanced it’s then no trickier then a skinny. Practise without wings – never letting your horse learn there is a run out option, if he does you may need to use wings to fix this. If you’re finding your horse jumps or bulges to the narrower side, approach with a strong outside leg and slight flexion towards the bulge as this will help him straighten.
7: Courses
When riding a course it’s just you and your horse, there is no instructor telling you what to do. Ride with your head and don’t forget to feel the messages coming from your horse. In the last few strides he will either be making a statement or asking a question– he could do several of each in quick succession. Ride positively forward and, even if he feels to be going nicely, be ready for him to change his mind at the last minute.
Each jump should be ridden as an individual, but continuously knit them all together in your mind. If you do have a problem address it then continue with the course, returning to the problem only once you have finished. Enjoy every minute –which you will if you’re ready for trouble every second.

